Additional file tools are located in the pane on the right side of the file window when a file is opened.
Tools include:
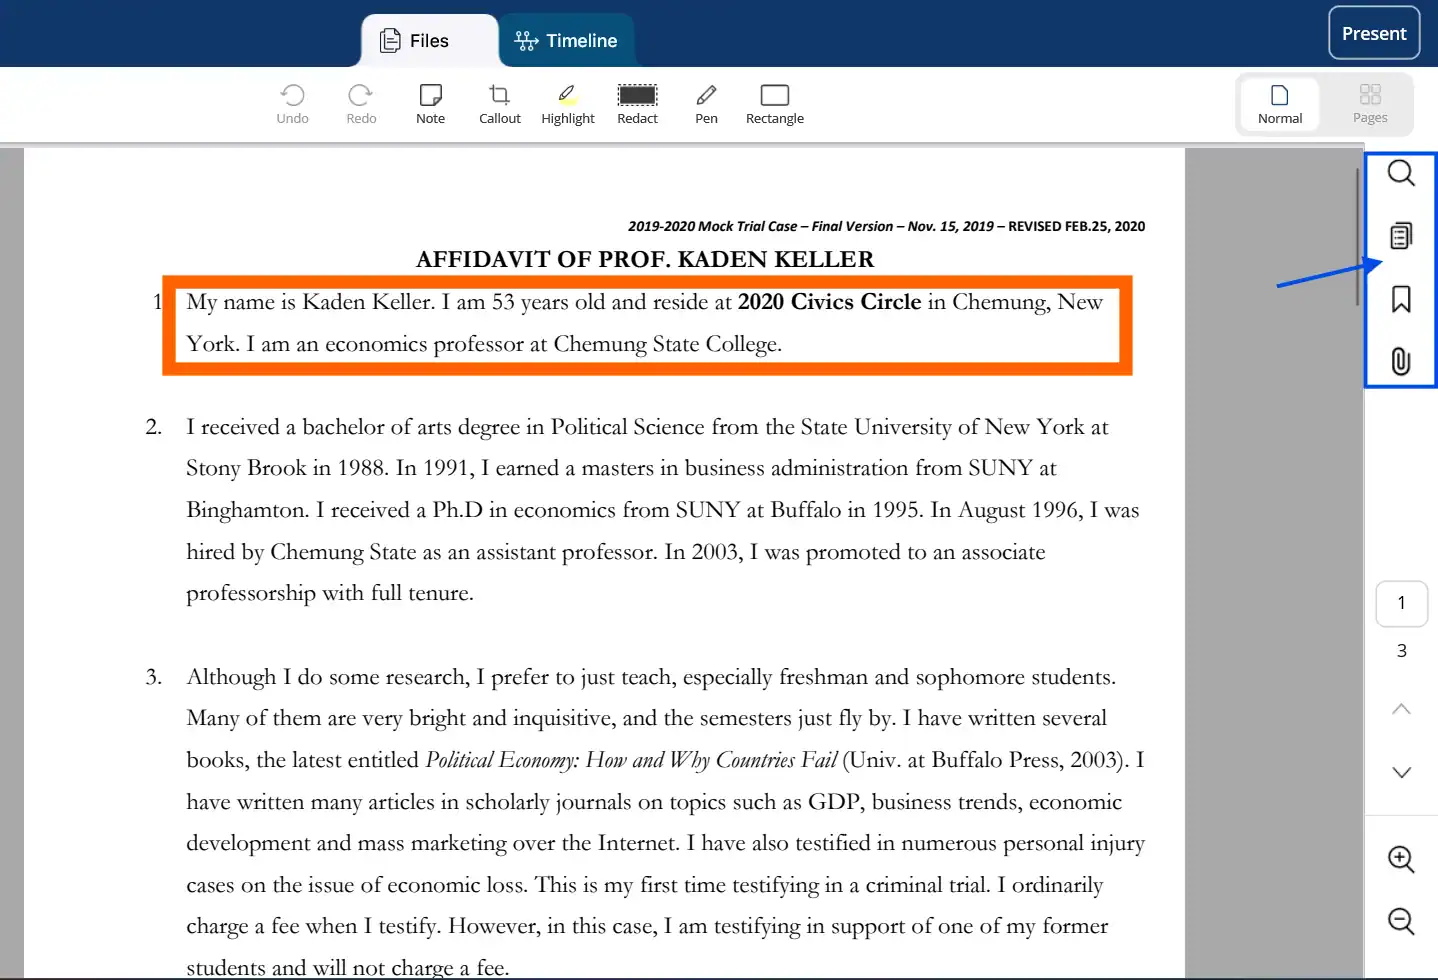
Select one of the tools to open the tool pane.
The tool pane can be closed by clicking the X in the left-hand corner.

Search
NOTE: This tool is only enabled for OCR’d files.
Click the magnifying glass icon to open the search tool.

Enter text in the search bar and hit the Enter or Return key. Results that match the search text are highlighted in the document and displayed in the search pane. The number of matches is shown below the search bar.

Navigate through the results using the up and down icons at the top of the search tool pane.
Select a result by clicking on it in the search tool pane. The document will scroll to the location of the result.
Clear the search bar by clicking the X in the search bar.
File Properties
Open the File Properties tool by clicking on the pages icon.
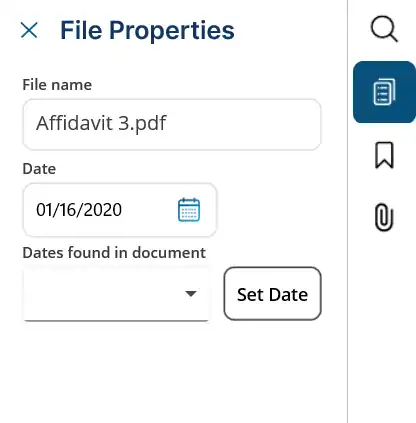
Each of the properties shown can be updated.
Updates are automatically saved when you close the file.
File name: You can change the file name as desired. The file extension will be automatically appended to the name, so there is no need to provide it.
Date: When the file is first added to the case, if it’s OCR’d, the app will scan the first page for dates and select the most relevant date. If the file is not OCR’d, no date is assigned. You can enter or choose a date.
Dates found in document: This is only available for OCR’d files. The app will extract all the dates from the first page of the file. You can select a date from the dropdown and click Set date to set it.
Bookmark
NOTE: This tool is only enabled for PDF files.
TIP: Since the Title text field can contain multiple lines of text, bookmarks can be useful for adding presentation notes.
Click the ribbon icon to open the File Bookmarks tool.

Existing bookmarks, if any, are displayed. Click on a bookmark to navigate to it in the file.
Add New Bookmark
To create a new bookmark, click New. The Create Bookmark window is opened.
TIP: If you select text before clicking New, that text will automatically be entered in the Title field.

The current page number is selected. You can select a different page by choosing a page number from the Page Number dropdown menu. Enter text in the Title field and click Create. The bookmark will display in the Bookmark pane.
Edit Bookmark
To edit a bookmark, click on the ellipses (three dots) for the bookmark, then select Edit.

The Edit Bookmark window is opened. Make any necessary changes, then click Save.

Delete Bookmark
To delete a bookmark, click on the ellipses (three dots) for the bookmark, then select Delete.
You will be asked to verify the deletion.
Connected Events
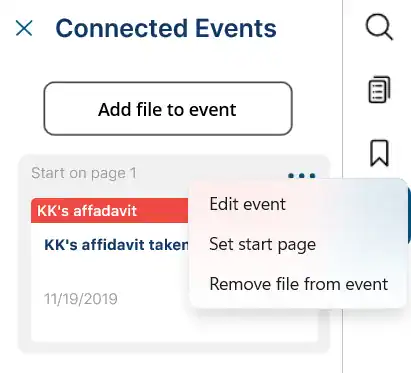
Click on the paperclip icon to open the Connected Events tool.
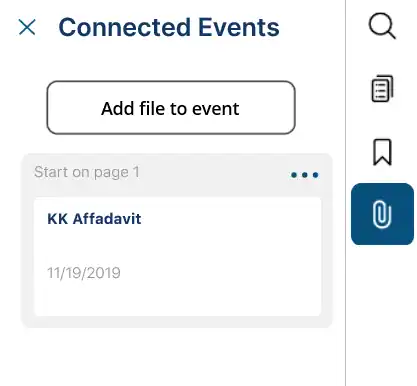
Files can be connected to timeline events. Existing events that the file is linked to, if any, are displayed.
You can connect the file to additional events (new or existing), edit the event, change the file start page, or remove the file from the event.
Add file to new event
NOTE: When you create a new event, it will appear on the timeline on the date specified in the event properties.
To create a new event and add the file to it, click Add file to event.
A pop-up window opens with the Add file to new event tab in view. Provide information for the event and add tags, if desired, then click Create. The file is linked to the new event, and the new event is added to the timeline.
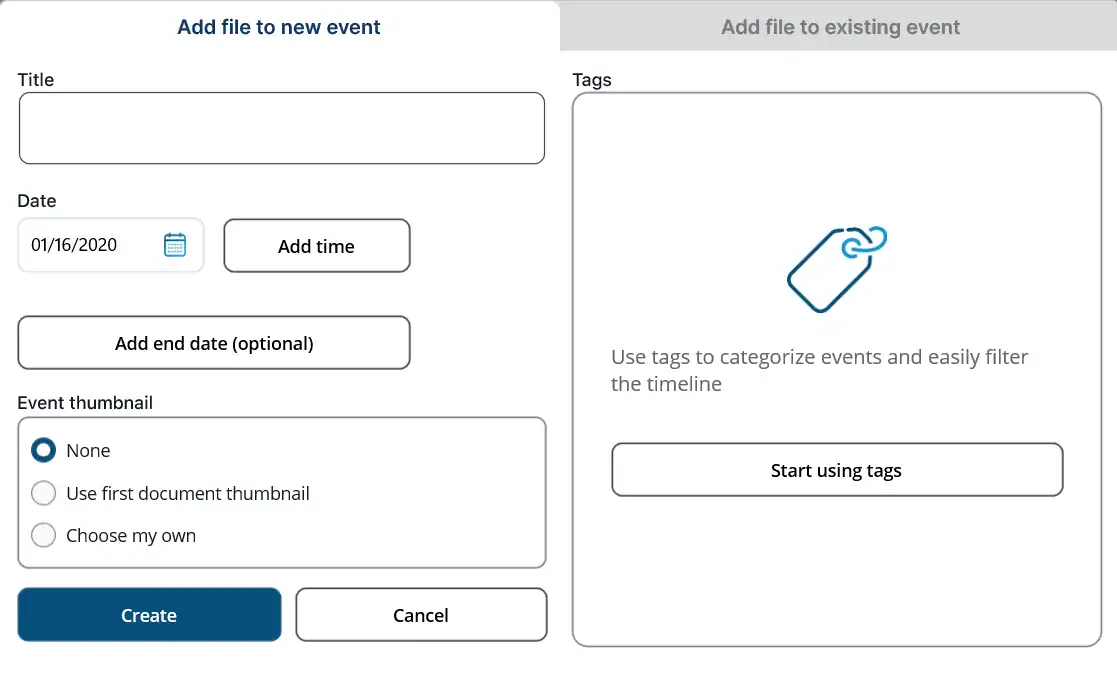
Title: Enter or edit the event title.
Date: Inherited from the main file, but can be updated. This is the date that the event will appear on the timeline.
Add end date (optional): End date is optional. Add an end date if desired.
Event thumbnail: If you want a thumbnail for the event to appear on the timeline, make a selection. If you select Choose my own, a Browse button will appear, allowing you to select a file from your device as the thumbnail.
Tags: Tags are optional. They are used to help filter events on the timeline. You can select existing tags or create new tags. See Managing Tags for details about adding and editing tags.
If there are existing tags, you can select a group to open it and then choose a tag from the group. You can select multiple tags. NOTE: On a Mac, use the Option key to select multiple tags.
If there are no tags, or you don’t see the tag you want, you can create a new tag.
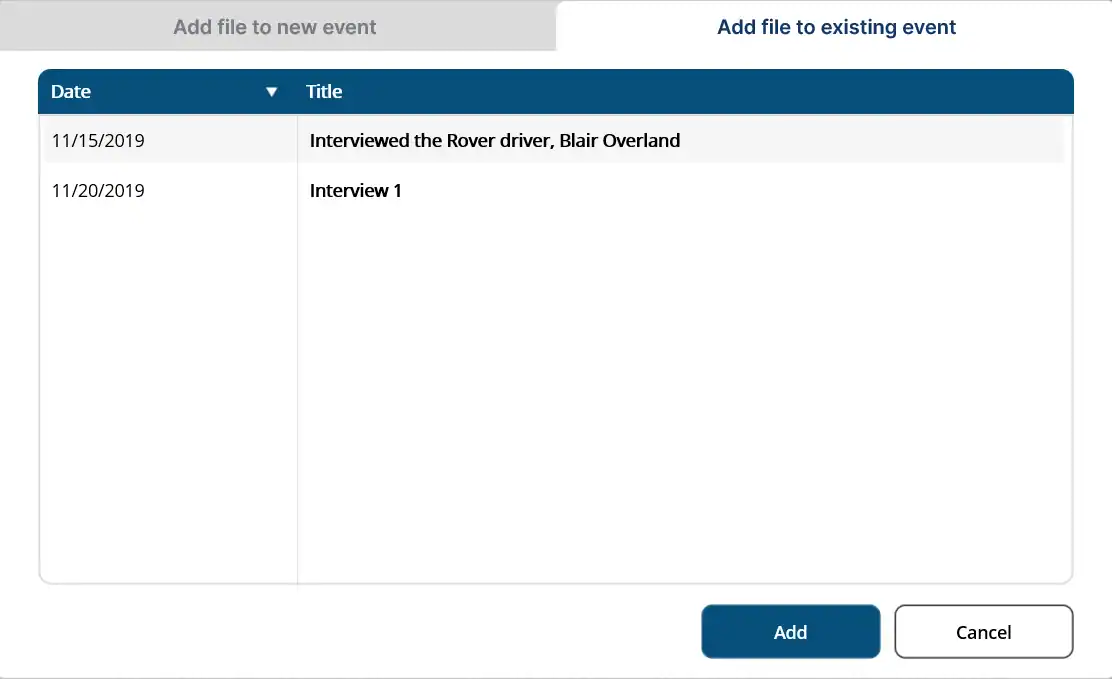
Add file to existing event
To add the file to an existing event, click Add file to event, then click on the Add file to existing event tab. NOTE: Events can be linked to multiple files.
Select an event to add the file to and click Add.
Edit event
To edit one of the events that the file is connected to, click the ellipses (three dots) on the event and select Edit event.
The Edit event window is opened. Make edits as needed and click Save. See Add file to existing event for details on each field.
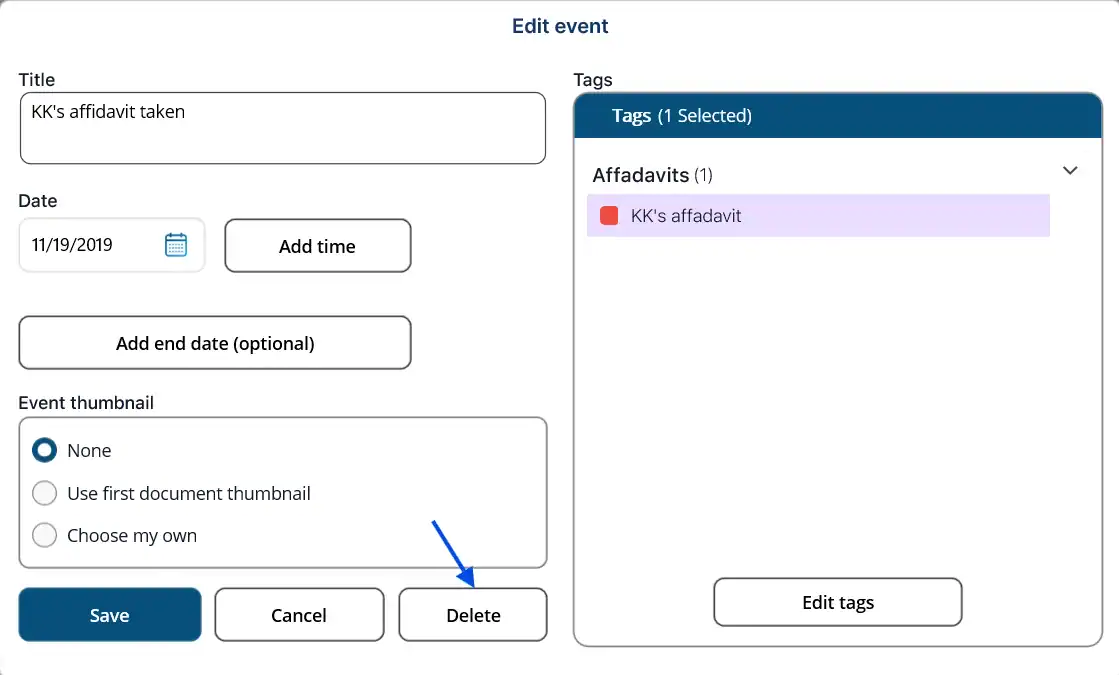
You can delete the event by clicking Delete. WARNING: This removes the event from the case altogether. To just remove the connection between the file and the event, use the Remove file from event option found in the ellipses menu (three dots) for the event. See Remove file from existing event.
Set start page
When an event is opened from the timeline, the files it is connected to are opened to the first page by default. You can change the file start page.
The file start page for the event is shown in the header of the event. You can change the start page by clicking the ellipses (three dots) on the event and selecting Set start page.
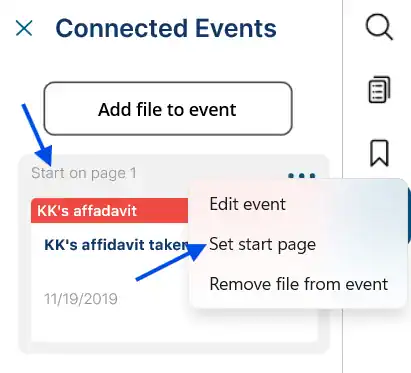
The Set file start page window is opened.
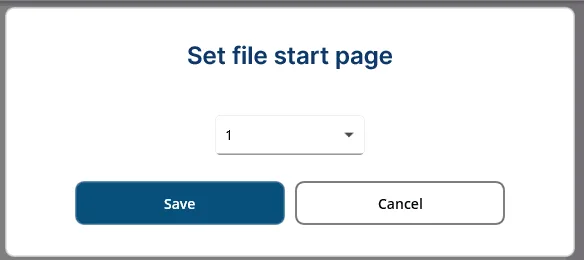
Select the page number you want the file to start on when the event is opened from the timeline, then click Save. The next time the event is opened from the timeline, the file will be opened to the selected start page.
NOTE: This can also be done when editing the event from the timeline. See Edit event under Timeline.
Pagination
NOTE: Pagination is only available for PDF files with more than one page.
The pagination tools are located in the bottom right corner of the viewing pane.

The top number indicates the current page number. The bottom number indicates the total number of pages in the file.
Enter a page number in the top field to go directly to that page in the file.
Use the up and down arrow icons to go to the previous or next page.
Zoom
The Zoom tools are located in the bottom right corner of the viewing pane.

Click the plus icon to zoom in. Click the minus icon to zoom out.