
Selected text tools
Tools are available for text that has been selected. These are available for PDF files with a text layer. A scanned PDF without a text layer gets one when it is added to the case (text recognition runs on your device), so the tools work on scanned files too.
Tools include:
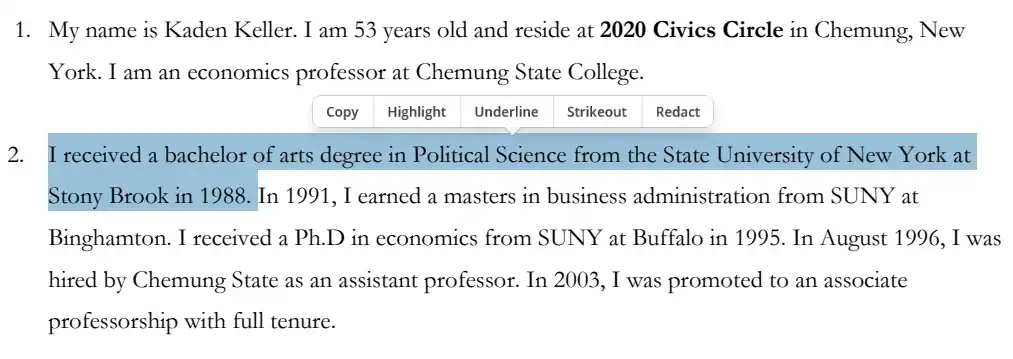
- Copy – selected text is copied
- Highlight – selected text is highlighted yellow
- Underline – selected text is underlined in blue
- Strikeout – selected text has a red strikeout applied
- Redact – selected text is covered in black
When you select text, the tools are shown. Choose a tool to apply the formatting to the selected text.
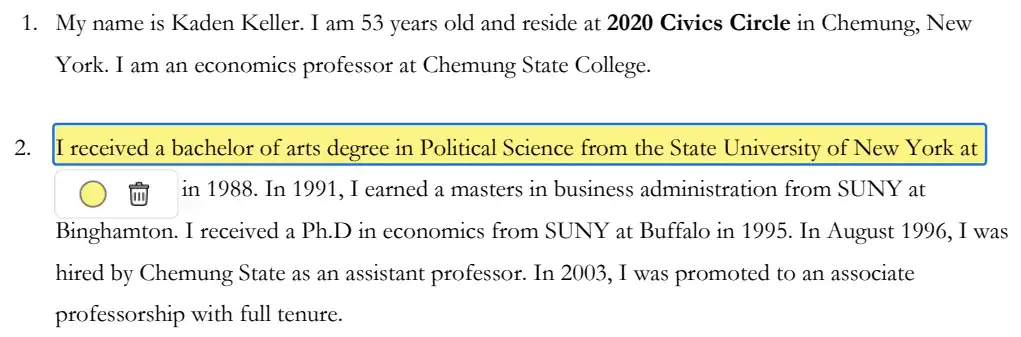
To change formatting color or remove the formatting, click on the formatted text. A rectangle is placed around the formatted text, and options to select a color or delete (trash can) the formatting are presented.
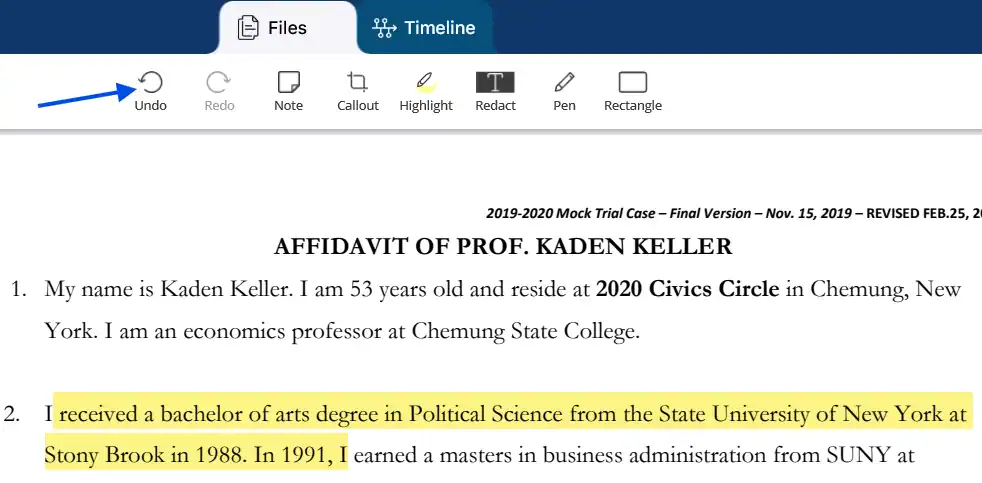
You can also remove formatting using the Undo option in the file tools in the header. This can only be used during the session in which the formatting is applied.
Tool pane tools
Tools in the tool pane in the header let you mark up the file.

Undo and Redo
Click Undo or Redo to undo or redo changes made during the current file session.
Note
Click Note to drop a sticky note anywhere in the file.
Enter your note, select a color using the color circle if desired, then click outside of the note to close it.
A note icon is shown where you dropped the note.
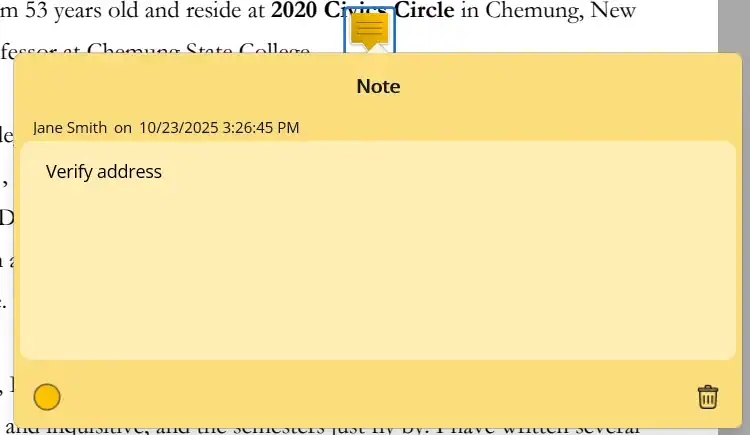
Click on the note icon to open the note. You can edit the text, change the note’s color (using the colored circle), or delete the note (click the trash can icon).
Callout
Call out a section of text by clicking Callout, then placing and dragging your cursor over the text you want to call out.
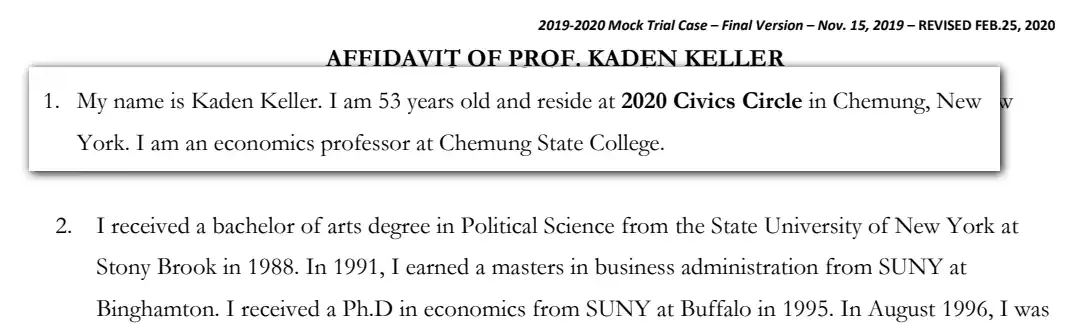
To move the callout, drag it. To resize it, drag one of its handles. While you present, the external monitor previews the change as you make it, so you see exactly what the audience sees. On the external monitor the callout opens with a zoom effect.
The callout remains until you remove it. To remove the callout, click it, then select the trash can icon.

Highlight/Underline/Strikeout
You will see either Highlight, Underline, or Strikeout in the tool pane, depending on which tool you used most recently.
Click on the tool in the tool pane and then select the tool and color you want to use.
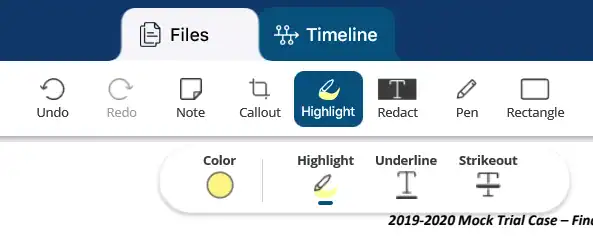
Once you’ve selected a tool and color, select the text you would like to apply it to.
NOTE: The Underline and Strikeout tools can only be applied to text that can be selected, so they cannot be applied to text that has not been recognized. The Highlight tool can be used as a free-form tool on text that has not been recognized.
To change formatting color or remove the formatting, click on the formatted text. A rectangle is placed around the formatted text, and options to select a color or delete (trash can) the formatting are presented.
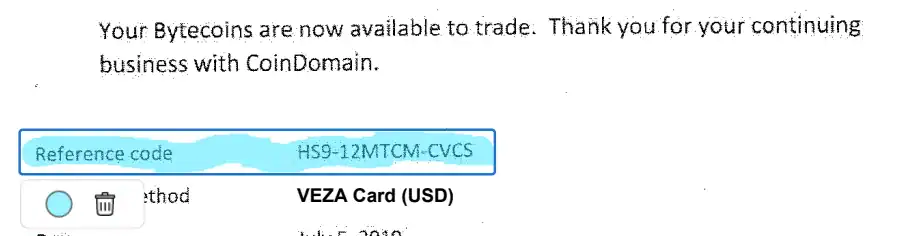
You can also remove formatting using the Undo option in the tool pane. This can only be used during the session in which the formatting is applied.
Redact
You can redact selected text or redact a selected area.
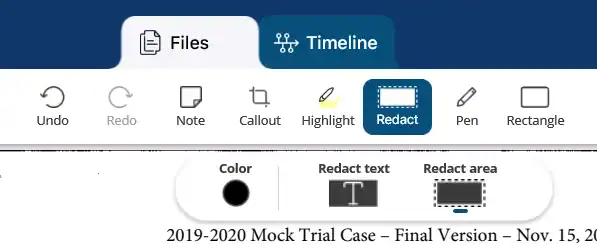
The Redact text tool can only be applied to text that can be selected, so it cannot be applied to text that has not been recognized.
Redact area can be used on OCR’d and text that has not been recognized.
Select Redact, then select Redact text or Redact area and a color.
Select the text or area that you want to redact.
Click on the redacted text or area to change the color or remove the formatting.
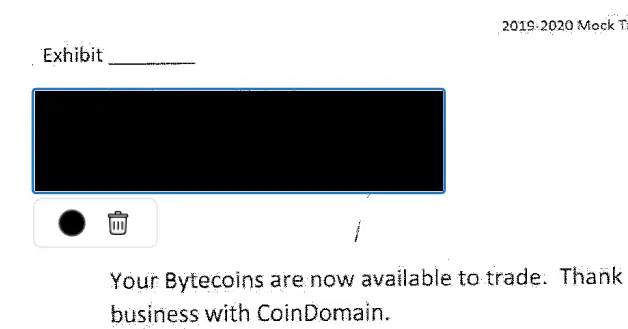
You can also remove formatting using the Undo option in the tool pane. This can only be used during the session in which the formatting is applied.
Pen
The Pen tool can be used on any PDF file.
Select Pen, then choose a color and a stroke size.
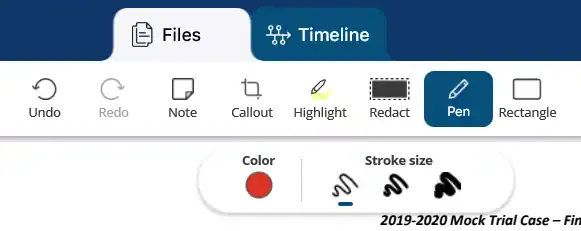
Draw or write on the file. This is a free-form tool.
Click on the pen marking to change the color or remove the formatting.
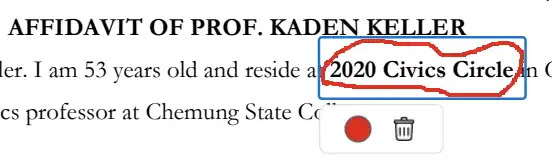
You can also remove formatting using the Undo option in the tool pane. This can only be used during the session in which the formatting is applied.
Rectangle/Oval
You will see either Rectangle or Oval in the tool pane, depending on which tool you used most recently.
Click on the tool in the tool pane and then select the tool, color, and border size you want to use.
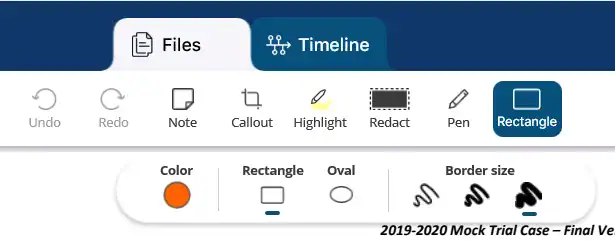
Select the area you want to draw a rectangle or oval around.
To change formatting color or remove the formatting, click on the formatted area. Options to select a color or delete (trash can) the formatting are presented.

You can also remove formatting using the Undo option in the tool pane. This can only be used during the session in which the formatting is applied.
Exhibit sticker
Click Exhibit sticker to label the file as an exhibit. The Add exhibit sticker window opens with a preview of the sticker.

The sticker has four lines: the case name, the exhibit title (for example GOVERNMENT’S EXHIBIT), the exhibit prefix and number (for example GX 11), and a footer. The case number from the case properties is filled in as the footer. Edit any of the lines as needed.
Choose a color and the placement on the page (top or bottom, left or right). Select Add exhibit sticker to every page to repeat the sticker on all pages, and Increment by page to number the pages in turn. Click Apply.

Exhibit stickers can also be added to image files. The exhibit number is shown next to the file in the file list. To edit or remove a sticker, click it. The Edit exhibit sticker window opens: change the fields and click Update, or click Remove to take the sticker off (this also clears the file’s exhibit number).
Click Print to print the file from Case Crafter. On Mac and iPad a print preview opens first, where you choose the printer and options. Print is also available in the Pages view.
Pages Tools
These tools let you delete, rotate, export or print pages of the file.
Click Pages. Thumbnails of all pages of the file are displayed in the window.
Tools are available at the top of the window.
Click Normal to return to the single page view.
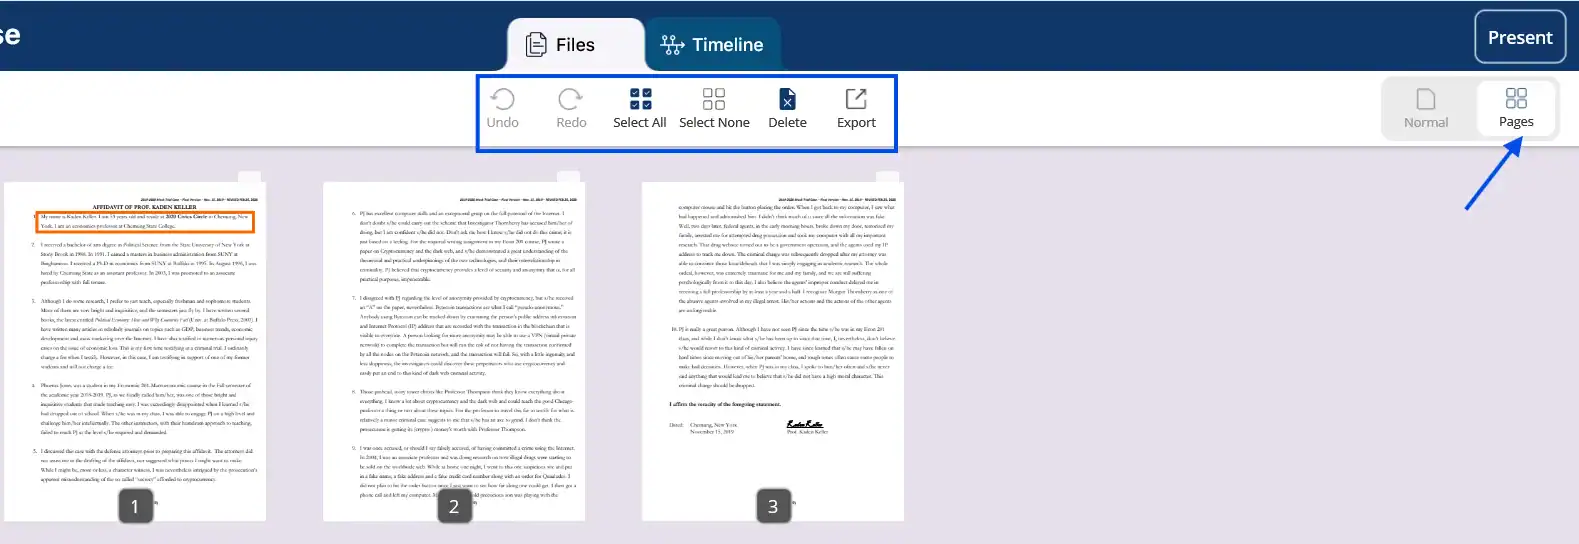
Select pages by clicking on them. Click again to unselect. You can select one or more pages at a time. Selected pages will have a blue check mark.
Click Select All to select all pages. Click Select None to unselect all selected pages.
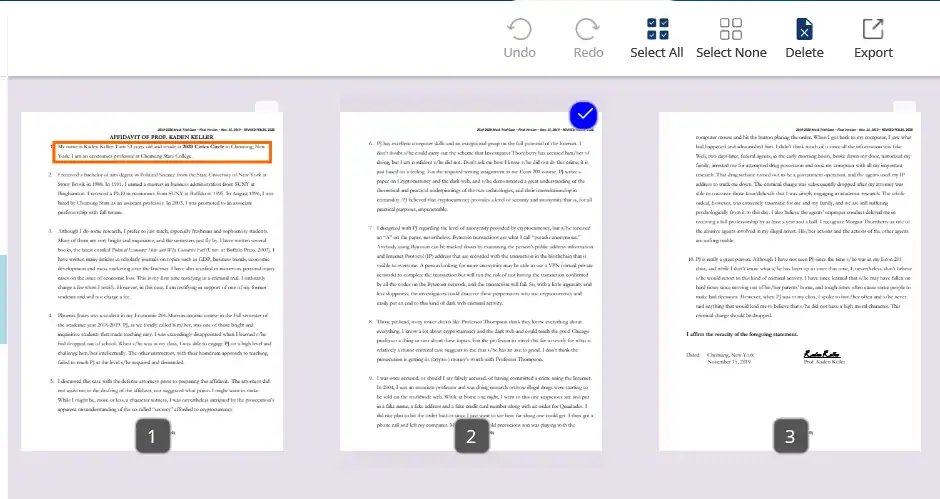
Delete pages
Delete pages from the file by selecting them and clicking Delete. All selected pages will be deleted from the file.
Rotate pages
Select one or more pages and click Rotate. Each click turns the selected pages a quarter turn.

Export pages
You can export selected pages to a new file, a file system, email, or to other application.
Select pages and click Export.
The Export selected pages window is displayed.
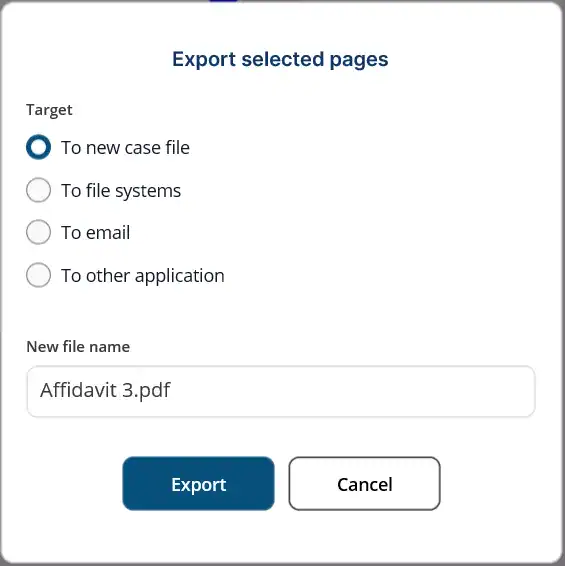
Select the target, enter a New file name if desired, and click Export:
- To new case file – The selected pages will be added to the case as a new file with the new file name. This file will appear in the case’s file list.
- To file systems – The selected pages will be added as a file with the new file name in the location you select.
- To email – The selected pages will be attached as a file with the new file name to an email. After you click Export, your mail service will be opened.
- To another application – The selected pages will be transferred as a file with the new file name to the application you select.
Compare two files
Click Compare in the header to open a second file next to the one you are viewing. The open file moves to the left half of the pane and the right half is empty.

Click the empty half, then click a file in the file list. It opens on the right, and the two files can be read side by side.

Click Normal to return to a single file.
Compare is also available inside an event opened from the timeline and while presenting, where both files are shown on the external monitor. See Present.