To add a new event to the timeline, click New Event in the timeline header.
NOTE: You can also add new events using the Connected Events tool when you are in a file. See Connected Events.

The New Event window is opened.
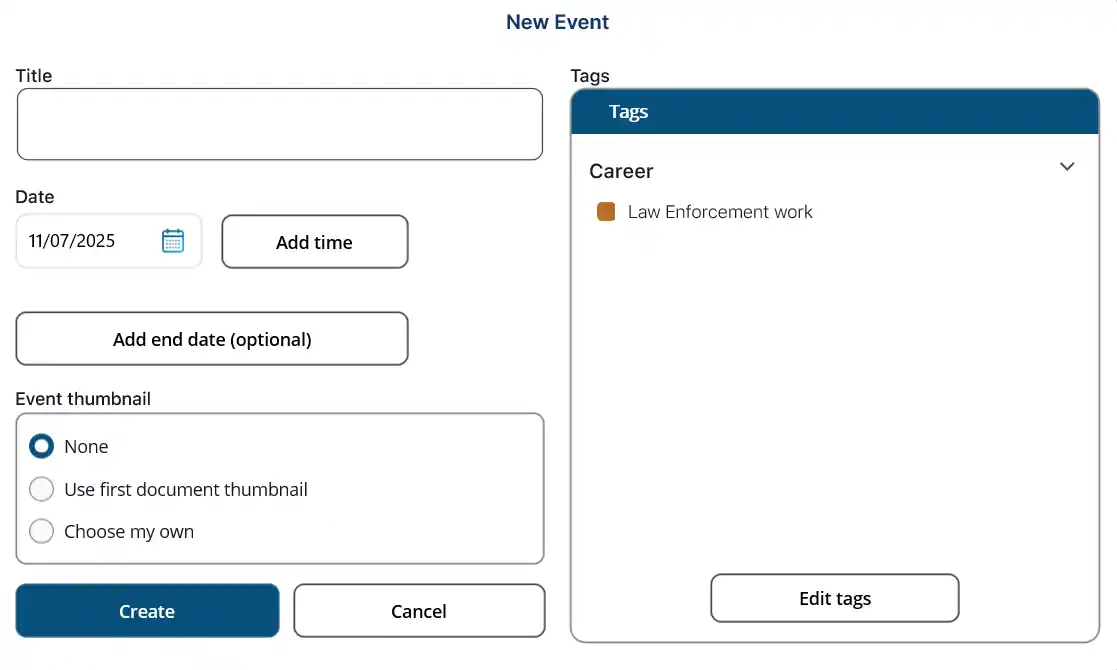
Provide information and click Create.
Title: Enter the event title/description.
Date: Inherited from the main file, but can be updated. This is the date that the event will appear on the timeline.
Time (optional): Click to enter or select a time. Click the X to remove the time.
Add end date (optional): End date is optional. Click to enter or add an end date.
Event thumbnail: If you want a thumbnail for the event to appear on the timeline, make a selection. If you select Choose my own, a Browse button is presented, allowing you to select a file from your device as the thumbnail.
Tags: Tags are optional. They are used to help filter events on the timeline. You can select existing tags or create new tags. See Managing Tags for details about adding and editing tags.
If there are existing tags, you can select a group to open it and then choose a tag from the group. You can select multiple tags. NOTE: On a Mac, use the Option key to select multiple tags.
If there are no tags, or you don’t see the tag you want, you can create a new tag.